
티스토리 뷰
#Fragment

Activity 위에 보여지는 View.
태블릿에서 화면을 분할하기 위한 용도로 개발됨
화면 분할 이외에 FrameLayout을 대체할 수도 있는 View로 사용된다.
Activity에 기생한다. Activity에 있는 자원들을 Fragment가 가져다가 쓸 수 있다.
Activity가 없으면 볼 수 없다.
#View Pager
여러 화면을 순서대로 보여줌.
화면을 쓸어 넘겼을 때 다음화면이 나오게끔 할 수 있다. 많이 쓰인다.
외부 라이브러리를 사용하여 예쁘게 꾸며줄 수 있다.
#단순하게 Fragment를 띄우기

1. activity_main.xml 을 다음과 같이 수정한다.
<?xml version="1.0" encoding="utf-8"?> <fragment xmlns:android="http://schemas.android.com/apk/res/android" xmlns:tools="http://schemas.android.com/tools" android:layout_width="match_parent" android:layout_height="match_parent" android:name="com.ktds.smahn.myfragment.MainFragment" tools:layout="@layout/fragment_main" /> |
프래그먼트는 초기화면이 필수이다.
tools:layout="@layout/fragment_main"
⇒ fragment_main.xml 이 Layout을 디폴트로 보여주겠다.
android:name="com.ktds.smahn.myfragment.MainFragment"
MainFragment.java가 처리해준다.
2. MainFragment.java

#여러개의 fragment 띄우기

1. Activity_main.xml을 다음과 같이 적는다.
<?xml version="1.0" encoding="utf-8"?> <RelativeLayout xmlns:android="http://schemas.android.com/apk/res/android" xmlns:tools="http://schemas.android.com/tools" android:id="@+id/container" android:layout_width="match_parent" android:layout_height="match_parent" tools:context="com.ktds.smahn.mymultifragment.MainActivity" />
|
2. FirstFragment 라는 이름으로 클래스와 레이아웃을 만든다.
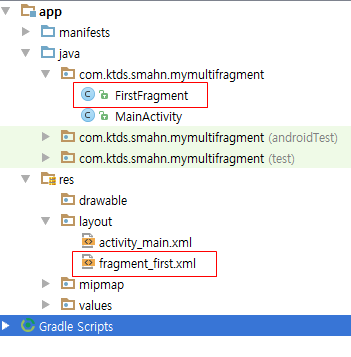
fragment_first.xml
<LinearLayout xmlns:android="http://schemas.android.com/apk/res/android" xmlns:tools="http://schemas.android.com/tools" android:layout_width="match_parent" android:layout_height="match_parent" android:orientation="vertical" tools:context="com.ktds.smahn.mymultifragment.FirstFragment">
<Button android:id="@+id/nextFragment" android:text="다음 Fragment" android:layout_width="match_parent" android:layout_height="wrap_content" /> <TextView android:layout_width="match_parent" android:layout_height="match_parent" android:text="첫번째 프래그먼트입니다." />
</LinearLayout>
|
FirstFragment.java
1 2 3 4 5 6 7 8 9 10 11 12 13 14 15 16 17 18 19 20 21 22 23 24 25 26 27 28 29 30 31 32 33 34 35 36 37 38 39 40 41 42 43 44 45 46 47 48 49 50 51 52 53 54 55 56 57 58 59 | package com.ktds.smahn.mymultifragment;
import android.os.Bundle; import android.support.v4.app.Fragment; import android.view.LayoutInflater; import android.view.View; import android.view.ViewGroup;
public class FirstFragment extends Fragment { // TODO: Rename parameter arguments, choose names that match // the fragment initialization parameters, e.g. ARG_ITEM_NUMBER private static final String ARG_PARAM1 = "param1"; private static final String ARG_PARAM2 = "param2";
// TODO: Rename and change types of parameters private String mParam1; private String mParam2;
public FirstFragment() { // Required empty public constructor }
/** * Use this factory method to create a new instance of * this fragment using the provided parameters. * * @param param1 Parameter 1. * @param param2 Parameter 2. * @return A new instance of fragment FirstFragment. */ // TODO: Rename and change types and number of parameters public static FirstFragment newInstance(String param1, String param2) { FirstFragment fragment = new FirstFragment(); Bundle args = new Bundle(); args.putString(ARG_PARAM1, param1); args.putString(ARG_PARAM2, param2); fragment.setArguments(args); return fragment; }
@Override public void onCreate(Bundle savedInstanceState) { super.onCreate(savedInstanceState); if (getArguments() != null) { mParam1 = getArguments().getString(ARG_PARAM1); mParam2 = getArguments().getString(ARG_PARAM2); } }
@Override public View onCreateView(LayoutInflater inflater, ViewGroup container, Bundle savedInstanceState) { // Inflate the layout for this fragment return inflater.inflate(R.layout.fragment_first, container, false); }
}
|
3. MainActivity.java
1 2 3 4 5 6 7 8 9 10 11 12 13 14 15 16 17 18 19 20 21 22 23 24 25 26 27 28 29 30 31 32 33 34 35 36 37 38 39 40 | package com.ktds.smahn.mymultifragment;
import android.support.v4.app.Fragment; import android.support.v4.app.FragmentTransaction; import android.support.v7.app.AppCompatActivity; import android.os.Bundle;
public class MainActivity extends AppCompatActivity {
//프래그먼트를 관리한다. private Fragment firstFragment;
@Override protected void onCreate(Bundle savedInstanceState) { super.onCreate(savedInstanceState); setContentView(R.layout.activity_main);
firstFragment = new FirstFragment();
setDefaultFragment(); }
/** * MainActivity가 처음 실행될 때 * 최초로 보여질 Fragment를 셋팅한다. */ public void setDefaultFragment() {
//화면에 보여지는 fragment를 추가하거나 바꿀 수 있는 객체를 만든다. FragmentTransaction transaction = getSupportFragmentManager().beginTransaction();
//첫번째로 보여지는 fragment는 firstFragment로 설정한다. transaction.add(R.id.container, firstFragment);
//fragment의 변경사항을 반영시킨다. transaction.commit();
} }
|
MainActivity는 fragment를 관리하는 역할이다.
V4와 v7의 차이
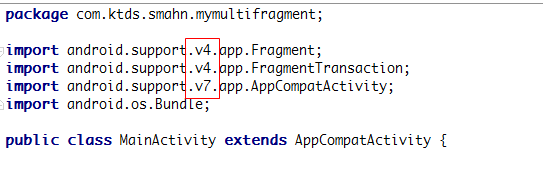
V4는 허니콤, v7은 아이스크림 샌드위치
4. 실행
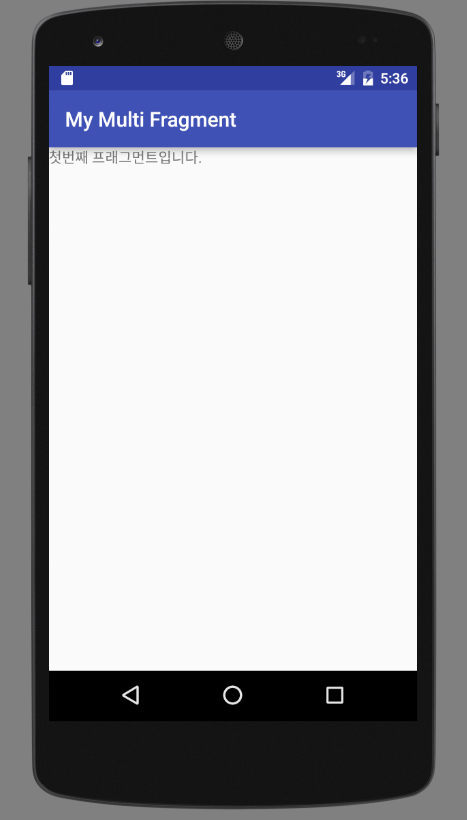
프래그먼트 하나가 떴다. 이제 하나 더 추가해보자.
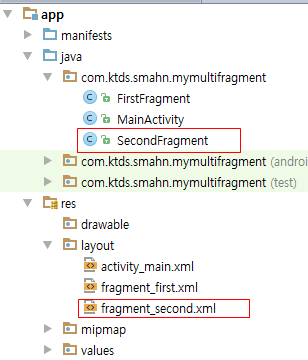
5. SecondFragment를 만든다.
SecondFragment.java
firstFragment.java와 똑같이 작성.
Fragment_second.xml
<LinearLayout xmlns:android="http://schemas.android.com/apk/res/android" xmlns:tools="http://schemas.android.com/tools" android:layout_width="match_parent" android:layout_height="match_parent" android:orientation="vertical" tools:context="com.ktds.smahn.mymultifragment.SecondFragment">
<TextView android:layout_width="match_parent" android:layout_height="match_parent" android:text="두번째 프래그먼트입니다." />
</LinearLayout> |
6. Fragment_first.xml 에 버튼을 추가한다.

7. FirstFragment.java 클래스에 onCreateView 메소드를 다음과 같이 채워준다.
private Button nextFragment;
@Override public View onCreateView(LayoutInflater inflater, ViewGroup container, Bundle savedInstanceState) { // Inflate the layout for this fragment View view = inflater.inflate(R.layout.fragment_first, container, false);
nextFragment = (Button) view.findViewById(R.id.nextFragment); nextFragment.setOnClickListener(new View.OnClickListener() { @Override public void onClick(View v) {
//안좋은 방법: 클래스 캐스팅을 통한 방법 //왜? MainActivity에서 밖에 쓸 수 없다. //((MainActivity) getActivity()).replaceFragment(2);
//좋은 방법: 인터페이스를 통한 방법법 //FragmentReplacable 를 쓰면 어딜가더라도 쓸 수 있다. ((FragmentReplacable) getActivity()).replaceFragment(2);
} }); return view; } |
8. FragmentReplacable 인터페이스를 만들어준다.
1 2 3 4 5 6 7 8 9 10 11 12 13 14 | package com.ktds.smahn.mymultifragment;
import java.io.Serializable;
/** * Created by 206-031 on 2016-06-16. */ public interface FragmentReplacable extends Serializable{
public void replaceFragment(int fragmentId);
}
|
9. MainActivity.java의 replaceFragment 메소드를 추가한다.
/** * @see FragmentReplacable * @param fragmentId */ @Override public void replaceFragment(int fragmentId){ //화면에 보여지는 fragment를 추가하거나 바꿀 수 있는 객체를 만든다. FragmentTransaction transaction = getSupportFragmentManager().beginTransaction();
//다음으로 보여지는 fragment는 fragmentId로 설정한다. if( fragmentId == 1 ) { transaction.replace(R.id.container, firstFragment); } else if( fragmentId == 2 ) { transaction.replace(R.id.container, secondFragment); } else if( fragmentId == 3 ) { transaction.replace(R.id.container, thirdFragment); }
//Back 버튼 클릭 시 이전 프래그먼트로 이동시키도록 한다. transaction.addToBackStack(null);
//fragment의 변경사항을 반영시킨다. transaction.commit(); } |
10. 실행


'프로그래밍 > 안드로이드' 카테고리의 다른 글
| View Pager 실습, 외부 라이브러리 사용하여 꾸미기 (1) | 2016.06.17 |
|---|---|
| Drawable Layout 실습하기 (1) | 2016.06.17 |
| [facebook 연동] 포스팅하기 (0) | 2016.06.16 |
| [facebook 연동]메뉴바에 글쓰기 버튼과 뒤로가기 버튼 만들기 (0) | 2016.06.16 |
| [facebook 연동] 메시지, 스토리, 링크 구분하여 뉴스피드 보여주기 (0) | 2016.06.16 |
- Total
- Today
- Yesterday
- 게시판 만들기
- mongo db
- JSP
- 메뉴바에 버튼 생성하기
- 예외처리
- 포스팅하기
- mybatis
- activity
- Linear Layout
- 제이쿼리
- 뉴스피드 가져오기
- intent
- 자바프로그래밍
- jQuery
- 메소드
- spring
- aop
- query
- facebook 연동
- 클래스
- sql
- ERD
- Relative Layout
- 글쓰기 버튼
- Erwin
- 쿼리
- 뒤로가기 버튼
- MVC
- er다이어그램
- 배열
| 일 | 월 | 화 | 수 | 목 | 금 | 토 |
|---|---|---|---|---|---|---|
| 1 | 2 | 3 | 4 | |||
| 5 | 6 | 7 | 8 | 9 | 10 | 11 |
| 12 | 13 | 14 | 15 | 16 | 17 | 18 |
| 19 | 20 | 21 | 22 | 23 | 24 | 25 |
| 26 | 27 | 28 | 29 | 30 | 31 |